Showing posts with label Painting. Show all posts

Saturday, October 26, 2013

Paper Plate Monsters!

I have to say that this is one of the most Bean-approved crafts we've done in quite some time. At 2.5 years she's all about doing everything by herself, and so in preparing our next Halloween craft I wanted to make sure she could do ALL of the steps totally by herself. Granted, this approach does mean extra thought and preparation time, but as far as i'm concerned it was absolutely worthwhile!


To make some silly and scary Paper Plate Monsters, you will need:
  • Paper plates
  • Poster paint
  • Paint brushes
  • Coloured craft foam sheets
  • Scissors
  • Black Sharpie
  • PVA glue


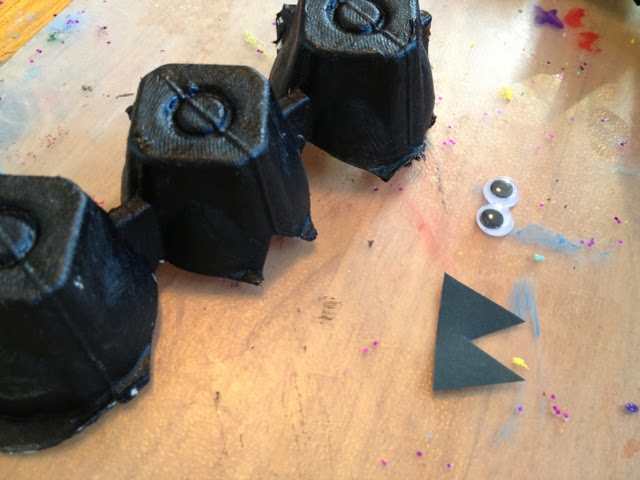
So, in terms of preparation the main thing to do once you've gathered all the bits and pieces is to take the foam sheets and cut out some sets of different monster-ish facial features and then draw in the details using a black sharpie pen. I intended to make three sets of eyes, nose, mouth, and eyebrows (although I somehow ended up with an extra pair of eyes!) that Bean could then mix and match to make three different monster faces - but of course you can do as many as you like! I also pre-mixed the paint into some shades I thought would look effective and mix together well as Bean likes to use all colours on everything!


Once it was all ready to go I put all the bits together in a box up on top of our art shelves and waited for an opportune moment to show it to Bean...And I didn't need to wait long!


First the painting!


Then leave to dry...and perhaps have a snack!


Once the plates are dry then the real fun begins!


Bean loved pouring the gloopy glue...


...and then selecting the features to use for each Monster face (ironically she chose to use one colour of features for each face)...


...leave the glue to dry...


...and there you have it! Scary silly monster faces perfect for Halloween decorations, story telling, and games of 'Monster Chasey' ;-)

Happy Playing!

Thursday, October 17, 2013

Halloween Egg Carton Bats

I'm always happy to discover new uses for egg cartons! They're such a versatile craft material and we have SO many of them constantly piling up in our cardboard cupboard. So for our next Halloween themed craft we made some cute hanging egg carton bats!


For this you will need...

Egg carton
Scissors
Black paint
Paintbrush
Black paper
Google eyes
PVA glue
Black string/wool/ribbon
Plastic beads

The 'How To'...

Use scissors or cut the egg carton into two lots of three egg cups. Trim the excess and cut fang shapes into the middle cup in each bat.


Paint the bats with black paint until completely covered, then leave to dry.


Cut two sets of bat ears from black paper and use PVA glue to attach each pair of ears to the top of the bats head. 


Glue the google eyes in place, then leave to dry again. 


Finally use scissors or a skewer to punch a hole in the top of the bats head behind the ears. Then thread a length of string, wool, or ribbon through the hole and secure by tying the inside end around a plastic bead.


The finished bats look scary in a delightfully cute way! Bean was ecstatic with her "Bouncy Bats" (the name she came up with for them), and although I had originally intended them as decorations for the kitchen it wasn't until the following day that she allowed me to hang them up!


She had great fun flying them around, telling stories, and playing scary chasey games...definitely a success!


Happy Playing! :-)

Friday, October 11, 2013

Fairy Wands

This was a really simple fun craft for little ones who love the world fairies. I stumbled across some plain wooden wands on a recent trip to the craft shop and set them up to be decorated that afternoon.

You will need:


  • Wands (if you can't find pre-made ones you could always make your own!)
  • Paint and brushes
  • glitter 
  • Sequins
  • Gems
  • PVA glue

First we painted the wands with poster paint...


Leaving them to dry while we went to do something else...


Then we squeezed some splodges of PVA glue onto the wands and added sequins, gems, and a good sprinkling a glitter! 


Leave to dry again and hey presto! Beautiful sparkly fairy wands perfect for dressing up, imaginary play, and story telling! :-)

I also plan to give these a coat of Mod Podge to protect them and give them an extra sheen, or you could also use a coat of slightly watered down PVA glue for basically the same effect. 

Happy playing! 


Friday, September 13, 2013

DIY Liquid Watercolors


I've been wanting to buy a set of liquid watercolours for Bean for AGES now, but so far they've just been a bit beyond our budget. Then the other day as I was drifting off to sleep I had a light bulb moment! Why not just buy normal kids watercolour tubes and water them down??! Well, it worked (and I don't know why I didn't think of it sooner, but there we have it). At only $10 for a set of watercolor tubes, that's a HUGE price difference for basically the same product, and because you control the quantities it'll last much longer as well. 


This exciting new discovery has opened up heaps of opportunities to do some activities that I've had on my list forever! So I thought i'd tell you about the first couple of ways we've used liquid watercolours this week...

First we tried some colour mixing and painting with pipettes, we did primary colours first and that was great to teach how to make colours (pictured is the second round we did using non-primaries at Bean's request).


The great thing about the watercolour tubes is that a little paint goes a VERY long way when it's watered down, you just need a bean sized amount for a whole cup of vibrant liquid colour.


Using the pipettes for collecting squeezing and mixing is great for co-ordination and building hand strength, and colour mixing for developing visual skills and colour recognition...and let's face it - toddlers LOVE squirting liquids of any kind!


The end result gives a lovely splattered effect. 

The second activity is one for bath time and all you need is a spray bottle full of the liquid watercolour (multiple bottles with different colours if desired!) and a bubble bath. Let the squirting begin! :-)


Spraying the tiles (which did of course spill over onto the walls and other surfaces, but i have found it all cleans up very easily)...


..."Purple rain!" (Bean unwittingly quoting Prince...hehe)...


...Lovely lavender bubbles...


...Filling containers with colour...


And of course there was plenty of squirting herself and mummy too!

All fantastic messy fun! And super easy clean up.

Happy playing! :-)