Showing posts with label Play. Show all posts

Wednesday, October 30, 2013

Halloween Sensory Box

The last post in our Halloween series before the day itself is upon us, and of course I just had to make it a sensory box! :-) This one is suitable to engage children 6 months - 3 years old, and takes the form of a Halloween treasure hunt for little toys buried in the lentils. Lentils are a lovely sensory material, they feel so wonderful running through your fingers, pour beautifully, and have the perfect Halloween themed colours! They're also completely safe for infants still in the oral phase.

For this activity you will need:

  • Large plastic tub
  • 4 bags orange lentils
  • 1 bag black lentils (french lentils)
  • Assorted Halloween toys (from dollar store)
  • Scoops, cups, cardboard tubes
  • Drop cloth
The set up is super quick...first pour all the lentils into the tub....


...and mix them together (Don't they look wonderful?)...


...Then get your treasures ready...


...These are the ones I chose to use...


...Now hide some of the treasures beneath the lentils, and use some for decoration...


...and your done! :-)


When Bean and I sat down to explore the box, she took her time exploring all the different items one by one as she uncovered them...


...She enjoyed pouring into the tubes and cups...


...but most of all she loved pouring on herself! (hence the drop cloth)
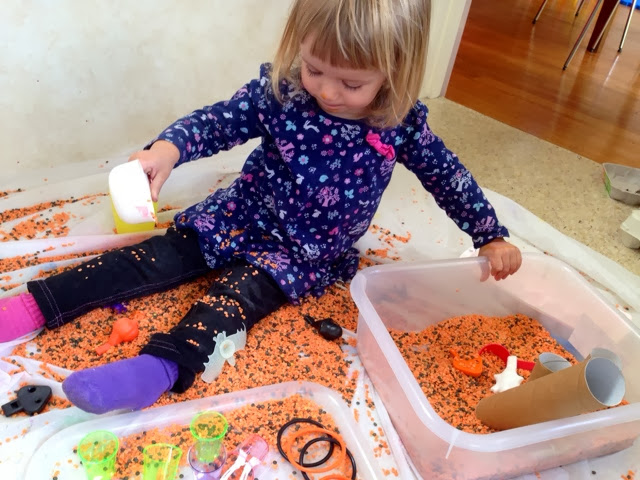

Once almost all the lentils were scattered and piled on the drop cloth, we told lots stories with the characters from the box (currently one of Bean's favorite kinds of play).


All in all it was a great way to start our Halloween celebrations and to introduce some more Halloween themed characters and toys for story telling and imaginative play. 
I hope you've enjoyed our Halloween series and had fun with some Halloween play yourselves. Now all that's left for us to do is get our costumes and treats ready for the big day tomorrow...

Happy Playing & Happy Halloween! 


Saturday, October 26, 2013

Paper Plate Monsters!

I have to say that this is one of the most Bean-approved crafts we've done in quite some time. At 2.5 years she's all about doing everything by herself, and so in preparing our next Halloween craft I wanted to make sure she could do ALL of the steps totally by herself. Granted, this approach does mean extra thought and preparation time, but as far as i'm concerned it was absolutely worthwhile!


To make some silly and scary Paper Plate Monsters, you will need:
  • Paper plates
  • Poster paint
  • Paint brushes
  • Coloured craft foam sheets
  • Scissors
  • Black Sharpie
  • PVA glue


So, in terms of preparation the main thing to do once you've gathered all the bits and pieces is to take the foam sheets and cut out some sets of different monster-ish facial features and then draw in the details using a black sharpie pen. I intended to make three sets of eyes, nose, mouth, and eyebrows (although I somehow ended up with an extra pair of eyes!) that Bean could then mix and match to make three different monster faces - but of course you can do as many as you like! I also pre-mixed the paint into some shades I thought would look effective and mix together well as Bean likes to use all colours on everything!


Once it was all ready to go I put all the bits together in a box up on top of our art shelves and waited for an opportune moment to show it to Bean...And I didn't need to wait long!


First the painting!


Then leave to dry...and perhaps have a snack!


Once the plates are dry then the real fun begins!


Bean loved pouring the gloopy glue...


...and then selecting the features to use for each Monster face (ironically she chose to use one colour of features for each face)...


...leave the glue to dry...


...and there you have it! Scary silly monster faces perfect for Halloween decorations, story telling, and games of 'Monster Chasey' ;-)

Happy Playing!

Thursday, October 17, 2013

Halloween Egg Carton Bats

I'm always happy to discover new uses for egg cartons! They're such a versatile craft material and we have SO many of them constantly piling up in our cardboard cupboard. So for our next Halloween themed craft we made some cute hanging egg carton bats!


For this you will need...

Egg carton
Scissors
Black paint
Paintbrush
Black paper
Google eyes
PVA glue
Black string/wool/ribbon
Plastic beads

The 'How To'...

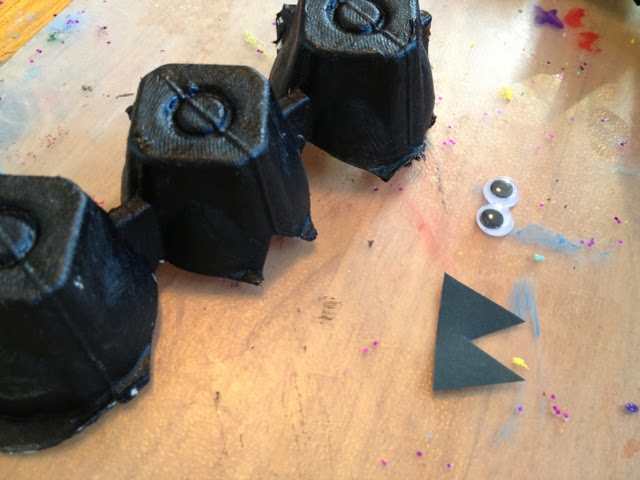
Use scissors or cut the egg carton into two lots of three egg cups. Trim the excess and cut fang shapes into the middle cup in each bat.


Paint the bats with black paint until completely covered, then leave to dry.


Cut two sets of bat ears from black paper and use PVA glue to attach each pair of ears to the top of the bats head. 


Glue the google eyes in place, then leave to dry again. 


Finally use scissors or a skewer to punch a hole in the top of the bats head behind the ears. Then thread a length of string, wool, or ribbon through the hole and secure by tying the inside end around a plastic bead.


The finished bats look scary in a delightfully cute way! Bean was ecstatic with her "Bouncy Bats" (the name she came up with for them), and although I had originally intended them as decorations for the kitchen it wasn't until the following day that she allowed me to hang them up!


She had great fun flying them around, telling stories, and playing scary chasey games...definitely a success!


Happy Playing! :-)

Wednesday, October 16, 2013

Sticky Window Pumpkin

I'm really excited about this post because it's the very first Halloween craft Bean and I have ever done! Last year she was a bit too small to do much in the way of crafting, and me being born in Britain and never celebrating Halloween growing up it took me a while to catch on! So, anyhow, I'm super excited to present the first in our series of Halloween themed activities for the month of October - sticky window pumpkins!


This is so simple and perfect for children age 1-3. All you need is...
  • Contact paper
  • Masking tape
  • Orange tissue paper 
  • Black paper 
  • Scissors
  • Black marker pen 


To prepare this invitation to play I cut a large piece of contact paper and used a black Sharpie marker to draw a pumpkin outline onto the clear side. I then stuck it to the window, sticky side out, with masking tape. Last of all I ripped up two tones of orange tissue paper into small pieces, and cut a jack-o-lantern eyes, nose, eyebrows, and mouth out of black paper.


Bean was excited to do this activity. She's just learning about all things Halloween and is totally fascinated by the concept! She placed the facial features and we filled in the orange colour together.


It didn't take long but it makes a stunning window decoration and has a wonderful warm glow when the sun shines through.


We have lots more Halloween fun to come - so stay tuned!

Happy Playing! 


Friday, October 11, 2013

Fairy Wands

This was a really simple fun craft for little ones who love the world fairies. I stumbled across some plain wooden wands on a recent trip to the craft shop and set them up to be decorated that afternoon.

You will need:


  • Wands (if you can't find pre-made ones you could always make your own!)
  • Paint and brushes
  • glitter 
  • Sequins
  • Gems
  • PVA glue

First we painted the wands with poster paint...


Leaving them to dry while we went to do something else...


Then we squeezed some splodges of PVA glue onto the wands and added sequins, gems, and a good sprinkling a glitter! 


Leave to dry again and hey presto! Beautiful sparkly fairy wands perfect for dressing up, imaginary play, and story telling! :-)

I also plan to give these a coat of Mod Podge to protect them and give them an extra sheen, or you could also use a coat of slightly watered down PVA glue for basically the same effect. 

Happy playing! 


Friday, October 4, 2013

Dinosaur Wash

I love it when Bean and I come up with a completely spontaneous activity together.  It can be something so simple but there is such a joy that shines when children invent their own activities that it often absorbs them more completely than any pre-planned ideas you the adult might have had. Bean is seriously into Dinosaurs, and also LOVES any kind of water play. One afternoon whilst we were telling a story with her dinosaur play set, the dinosaurs had been "jumping in muddy puddles" and Bean decided they all needed a bath...So we set up a Dino-Wash!


The key here was allowing Bean to take the lead in initiating and setting up the activity, helping her find something to use as a bath, giving her a plastic jug and step up to the tap so she could fill the bath herself, getting her to squirt in some bubble bath, and going on a hunt around the house to find various scrubbers and sponges we could use for washing.


I find these days that the process of setting up the play area (whatever it is she might want to do) is as important as the play itself for Bean. I also find if she's actively involved in setting up she readily helps with putting away once the activity is over.


With a squirt of bubbles and some warm water away she went giving her dinosaurs a thorough clean! 


Of course a LOT of water ended up on the floor, which is why I chose to do this in the bathroom with some towels down. 

It was simple clean fun, good for sensory, motor, and role play, and it doesn't have to be dinosaurs of course...plastic animals, dolls, little people, my little ponies, or even give them some plastic plates and cutlery for 'washing up'. Every kid likes bubbles and water so you can't really go wrong!

Happy playing!

Tuesday, September 24, 2013

Nursery Rhyme Puppet Show

I cannot begin to tell you just how much we have played with this simple puppet show over the last couple of months. It was something I came up with for Bean one winters day when we were stuck inside and at a bit of a loose end! Bean LOVES anything involving story telling and imaginary play, so this was a total hit with her. Its a perfect rainy day activity for children 2.5 years and older as they can choose the stories and help make the scenery and puppets as well.


To make this we used:
  • Old cardboard box (thick cardboard)
  • Small sturdy cardboard box
  • Cereal box (or other thin cardboard)
  • Scissors
  • Sticky Tape
  • Small googly eyes
  • Coloured pens
  • A4 coloured paper
  • Lollipop sticks
  • Blue tack


The 'stage' to hold the background scenery was made by cutting a thick price of cardboard from an old box into a rectangle (must be at least A4 size), and then attaching another small box to the back to hold it upright, using a strip of cardboard and sticky tape. 

The backgrounds are simply A4 peices of coloured paper, stuck to the stage with blue tack, and decorated with coloured pen, pastels, and cut out paper to make the scenery for the story. 


The puppets were cut out from thinner cardboard (we used empty cereal boxes) to make the body shapes, decorated with coloured pens and googly eyes, and then stuck to lollipop sticks with sticky tape. Bean was able to help with decorating the backgrounds and puppets, sticky taping things together, and of course chose which stories we would make. 


It's so incredibly simple to do, and you can make as many puppets and as many backgrounds as you like! We ended up making quite a few over a number of days, and even now we will add on a new story from time to time. We started off doing nursery rhymes, Baa Baa Black Sheep pictured above...


...Little Bo Peep...


...Incy Wincy Spider...


...Jack Be Nimble...


...Jack and Jill...


...Little Miss Muffet...


...Hickory Dickory Dock (made using a paper plate, cereal box clock hands, and a split pin to hold them in place and allow them to turn)...


For this one the mouse and cat were made using small and large coloured pom poms glued together using a hot glue gun, with googly eyes and kitchen string for whiskers...


...and then we moved on to some of Bean's favourite movies, above is The Lonely Goatherd from The Sound of Music (As yet unfinished, few more characters to make!)...


...But the one which has been by far Bean's favourite and most used...The Wizard of Oz!

As you can probably see this puppet show has been well loved, and therefore has seen a bit of wear and tear. If I had pre-planned this activity I might have decided to laminate the backgrounds and even the puppet bodies after decorating to make them a bit more durable long term. It would be particularly recommendable if you have multiple children playing or children younger than 2, and i've already thought of re-making this puppet show with the other Little Beans when we start day care and laminating it to be an ongoing resource. 

I really hope you try this one at home!

Happy Playing!